Wednesday, 8 September 2010

Procedural Planets

This is the same procedural trick all over again... A planet is an enormously complex thing; it is basically impossible to model one by hand so procedural generation is key to making a believable looking planet. This planet is generated using the built in procedural textures of Blender - mostly perlin noise which defines the height of the land, texture of the water and location of the clouds.

You can watch a video of this planet in action on Youtube.

Software used:
Blender: Modeling, texturing and rendering.
ffmpeg: Video transcoding.

Wednesday, 11 August 2010

Procedural Trees

Organic objects, particularly plants and trees, are every 3D artist's nightmare. They are very familiar objects with a huge amount of detail which is really hard to capture within the memory constraints of pre-rendered graphics and polygon constraints of real time graphics.

The best approach is not to try and model or paint the detail yourself but design a program which can "grow" the graphics for you... The images of branches below are generated by a custom script in ImageJ, this is an example of procedural generation, which can generate huge detail very quickly. The graphics are made up of three parts; the alpha map (black shows that area should be transparent, white indicates opaque), the bump map (which adds depth and shape to the shading of the texture) and the diffuse texture (which provides the colour).

The alpha map (black is transparent).
The bump map (white is higher).
The diffuse texture (the colours to use)

Putting 6 of these computer generated textures together a pretty detailed tree can be made with just a few polygons. These trees render quickly and could be used in a computer game.Software used:
ImageJ - Procedural generation of textures.
Blender - Creation and rendering of 3D models.

Sunday, 8 August 2010

SEM Zoom!

Scanning electron microscopes have an amazing range of magnifications, from around 20x to 20000x! It is very hard to give a sense of this range of scales, so have a look at this video instead... It starts at 25x, about 6mm across the whole field of view, and zooms in to 12000x, about 12um across the whole field of view. The circular objects are glass beads 10um across, for comparison a red blood cell is around 8um across.

Software used:
ImageJ - video generation from a series of SEM images
FFMpeg - video transcoding

Tuesday, 13 July 2010

Extended Depth of Field

One of the tricky things with microscopy and macro photography is the depth of field, as you start magnifying a sample you need to collect as much light as possible to generate the image with a sensible exposure time. Unfortunately this requires a large aperture, and this creates a very shallow depth of field...


This micrograph of a diatom clearly shows the problem, it is impossible to get the whole sample in focus in one image. Fortunately there are ways around it; by analysing the image for sharp edges it is possible to find which image is the most in-focus and the whole image can then be reconstructed only using the in-focus patches. This process is called focus stacking and generates an extended depth of field. Good free implementations of focus stacking are hard to come across, so I wrote one; you can download the ImageJ macro here.
Using the same technique on macro photography (processing the red, green and blue channels separately) gives a similarly impressive result. The three starting images:


And the extended depth of field result:
Software used:
Image processing: ImageJ

Monday, 12 July 2010

Diatomacious Earth

This is a picture of diatomaceous earth, also known as diatomite or kieselgur, as viewed under bright field illumination on a light microscope. View the full image (7000px wide) on Wikipedia and explore it! The diatom particles are in water and the image is covers a region of approximately 1.13 by 0.69 mm.

You won't have heard of diatomaceous earth, but you will have used it! It also looks amazing under a microscope. Diatomaceous earth is a soft, siliceous, sedimentary rock made up of the cell walls/shells of single cell diatoms and readily crumbles to a fine powder. It is used for cleaning (scouring), filtration, heat-resistive insulation, killing headlice and as an inert absorbent substrate. Its most famous use was by Alfred Nobel who developed dynamite; a mixture of diatomaceous earth and nitroglycerin! Diatom cell walls are bivalve, i.e. made up of two halves, and are made up of biogenic silica; silica synthesised in the diatom cell by the polymerisation of silicic acid. The two main groups of diatoms are centric (radially symmetric) and pennate (bilaterally symmetric).

Make sure to explore the image properly, there are so many fossils to see!


Friday, 18 June 2010

Some more instructables fun... A variable neutral density filter in the cheapest possible way. This can be used to get shallow depth of field (wide aperture) or motion blur even under bright light conditions.


Simple Variable Neutral Density Filter - More DIY How To Projects

Friday, 11 June 2010

Blooming

The movement of Oxalis triangularis is not limited to its leaves; a high definition timelapse of the opening of the flowers is really spectacular!

Monday, 7 June 2010

Moving Plants and Distorted Time

Plants move a surprisingly large amount, whether it is phototropism (growth towards light), nastic movements towards or away from stimuli (eg. photonasty) or other rapid plant movements. Oxalis triangularis (also known as the love plant or purple shamrock) goes to "sleep" every night. The leaves are light sensitive and fold away as the light levels drop towards the end of a day in an example of photonasty.


Click through to see a high definition time-lapse - one image captured every 30 seconds for about 1.5 hours, played back at 25 frames per second; ~750x actual speed! The exposure time was progressively increased through the video so the drop in ambient light levels which triggers the movement can't be seen.

Thursday, 15 April 2010

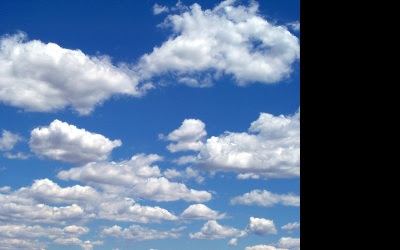
More Intelligent Scaling

Now even more intelligent... Scaling up and/or down at increased speed (although with slightly lowered quality).

Source image:
Scaled wider and shorter:
Scaled narrower and taller:
Download the ImageJ macro here.

Software used:
Image creation: ImageJ

Twittering Testing

We live in one crazy linked up world...

Intelligent Image Scaling

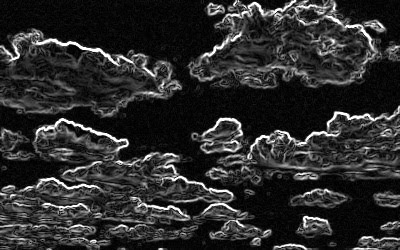
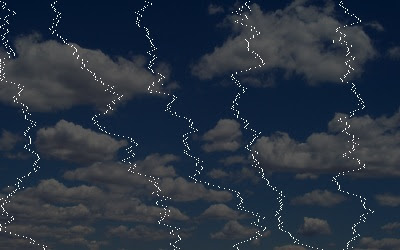
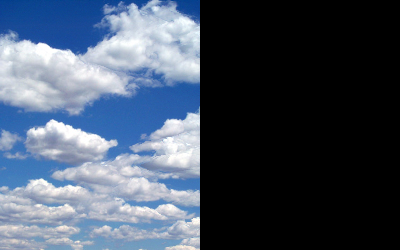
Intelligent modification of images is all the rage at the moment, especially with Photoshop CS5's fancy new tools for healing imperfections in the image... This is my take on a classic implementation of intelligent image shrinking, using an edge detection to determine the bits of the picture that are "interesting" then drawing seams down the image through the boring regions and then removing pixels along this path.

This implementation is 100% coded from scratch and can be used for any project under the terms of the GPL v2 or later.

The test image:
The edge detection to find objects:
And 5 example low detail vertical "seams" which run through the image. These are the lines of boring pixels which will be removed to make the image narrower.
Removing 100 seams of pixels makes the image 100px narrower. See the following images for an example of the resizing in progress:
You can watch the scaling of four example images at YouTube.
Download the code for the ImageJ macro (used for rescaling of these images) here.

Software used:
Image creation: ImageJ
Video transcoding: VLC media player

Wednesday, 17 March 2010

Webcam Microscopy


Just a very short post sadly, real life is pressing down on me again... But check out my latest Instructable; with a normal webcam and 5 minutes you can make a >100x microscope...

Sunday, 17 January 2010

Digital Pinhole Photography

Pinhole photography is a fantastic example of how really basic optics, the simple particle-like quality of light, can give impressive results... Having recently got my hands on a digital SLR I had a play to make a high quality pinhole "lens" for it.Basing the pinhole on a camera body cap makes it very simple to handle, it can be swapped on and off like a normal lens and has no problems with light leakage etc.The pinhole is handmade from a piece of 0.5mm aluminium with a hole poked through using a penkife and safety pin.Given it is 100% handmade and stuck together with tape it gives impressively good results!If you are interested in making one yourself check out my instructables project with step by step instructions.