Showing posts with label depth of field. Show all posts

Thursday, 3 April 2014

Cheeky


Human cheek cells are a classic subject of school microscopy. It is easy to collect some by gently scraping the inside of your cheek. This is a high resolution phase contrast image of one of my cheek cells, put together using focus stacking of a 4 by 4 montage of 57 focus slices using one of my ImageJ macros. The detail of the nuclear structure, the granular contents of the cytoplasm and the structured surface of the cell really jump out.

This cell is quite large for mammalian cells, about 75 μm across, and around 10 times larger than the single cell Leishmania parasite I currently do much of my research on. If you have sharp eyesight you can even see human cheek cells by eye (although only just) when they are spread on a slide.

Like most mammalian cells, cheek cells are essentially transparent. If you use a microscope in the most basic way, essentially as a giant magnifying glass, shining light straight through the sample towards your eye, you see something like this:

Bright field micrograph of a human cheek cell.

This picture has even had the contrast artificially enhanced. Practically it is tough to even find the cells on the slide and get them in focus!

For many years the best alternative was oblique or dark field microscopy. Here you deliberately avoid shining light straight through the sample, and instead make sure that only light scattered by structures in the sample can collected by the objective lens and get up to your eye.

Dark field micrograph of a human cheek cell.

Images by dark field microscopy can be hard to interpret, and are typically limited to fairly low resolution.

More complex methods based on interference of light travelling through the sample were developed in the 20th Century. These methods, phase contrast and differential interference contrast, were a revolution. They allowed completely new approaches for looking at the biology of cells, particularly live cells and dynamic processes like cell division. They were such a revolution that the inventor of phase contrast microscopy, Frits Zernik, was awarded the Nobel prize in Physics in 1953 for this work.

Phase contrast micrograph of a human cheek cell.

DIC micrograph of a human cheek cell.

It was not until the development of the famous green fluorescence protein, for fluorescence microscopy in live cells in the 1990s, that there was another discovery which improved the capacity for live cell microscopy to the same extent as phase contrast and DIC.

Software used:
ImageJ

Monday, 6 January 2014

Mould

Have you ever looked closely at mould?


Look closer...


Classic pin mould, like you often find on decomposing fruit, is an amazing micro machine. The head of each pin contains the developing spores which are released to spread the mold. This release process ranges from the gentle to the extreme, from a gentle puff of spores to one of the fastest events in the natural world. The hat thrower fungus pin head fires off the end of the pins with an acceleration of 0 to 45 mph in less than 1 mm; an acceleration of over 20,000 g.

Software used:
UFRaw: Raw to tiff conversion of raw camera files.
ImageJ: Focus stacking.
Hugin: Panorama stiching.

Friday, 11 October 2013

Making Big Things Look Small

Any photo normally give you an immediate sense of scale, but what is it about the picture that let's you know how big something is? Take a look at these two photos:


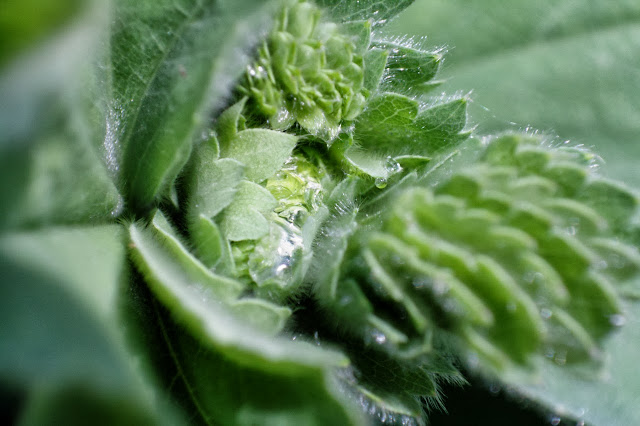
The first photo is clearly of some tiny water droplets on a plant, while the one on the right is clearly of a train running through a city. It isn't just content (train vs. droplet) and context (city vs. leaf) that inform you about the scale; you can trick you eyes into thinking a massive building is actually a miniature. There are other properties of the image that come into play.

The key is blur. In photos of tiny objects the background and foreground of the image are normally very blurred, but with big objects the background and foreground are normally sharply in focus. I talked about this effect in my last blog post; the bigger the ratio of the size of the lens to the distance to the object, then the more blurred the background and foreground look. Microscopes take this to the extreme, when out of focus parts of the image are so blurred that you can't see what is there at all.

This effect is universal, it even happens with your eyes. You can try it out: hold your finger close to your face (about 15cm/6in away) and look at it with one eye closed. Notice how blurred things in the background look. Now hold out your hand at arms length, and look at it with one eye closed. Now the objects in the background look more sharply in focus.

So to make something big looks small you need to make the foreground and background look blurred. Simple! Before digital image processing (Photoshop) effects like this had to be done in camera. It was surprisingly easy; take a camera with a detachable lens, and detach the lens from the camera. If you now set up the lens pointing at something you want to take a photo of, but tilt the camera relative to the lens, then you get an effect which is a bit like blurring the foreground and background of the image. This happens because one side of the image sensor/film is now a bit too close to the lens. This makes that side of the camera long sighted, and that side of the image blurry. The other side of the image sensor/film is also at the wrong distance from the lens, but is a bit too far instead of a bit too close. This makes the other side of the camera a bit short sighted, and makes that side of the image blurry too. The middle of the image sensor/film is still at the correct distance from the lens though, so the middle of the image is still in focus.

In principle this is simple, but in practice detaching the lens from your camera just means lots of stray light can sneak into the photo making glare. In practice you need to use a special lens which can be tilted while still attached to the camera, called a tilt shift lens. These are very specialised and cost a huge amount; it is much cheaper to fake the effect using a computer! There are many pieces of software that let you imitate tilt shift lenses, all that is needed is a gradually increasing blur as you move away from the line across the image that you want to remain in focus. I actually wrote a filter in ImageJ which does this processing. It is amazing how much this simple effect can trick your eye; it makes big things looks small by imitating the limitations of focal depth when using lenses to make an image.

This is the same photo as above, but with a tilt shift effect applied to it. This chunk of London now looks like a miniature, with a tiny toy train running through it.

The Tower of London, looking a lot smaller than usual!

The reverse effect happens too, though is psychologically less strong. This is part of the reason scanning electron microscope images are so compelling; they don't use light or lenses (at least in a conventional sense) to generate the image. This lets everything, from background to foreground, be sharply focused. It makes the microscopic world feel free big and accessible.

This diatom shell is less than a 0.1mm wide, but the sharpness of the foreground and background make it feel larger.

Artificially blurring the foreground and background makes it seem much smaller.

When communicating science it is important to think about the scale things appear; scanning electron microscope images break your intuitive concept of scale, and it is hard to imagine just how small the sample is. The image below, by Donald Bliss and Sriram Subramaniam and awarded Honorable Mention in the National Geographic best science images of 2008, is of the structures inside a single cell, and is a perfect example of why you need to think about scale. This image is a computational reconstruction, so it could be presented with pin sharp focus, but by blurring the background it conveys the sense of scale extremely well. It feels like a single cell.


Software used:
Photomatix Pro: Generating the tonemapped HDR photos.
UFRaw: Camera raw file conversion.
ImageJ: Custom tilt shift filtering.

Tuesday, 13 July 2010

Extended Depth of Field

One of the tricky things with microscopy and macro photography is the depth of field, as you start magnifying a sample you need to collect as much light as possible to generate the image with a sensible exposure time. Unfortunately this requires a large aperture, and this creates a very shallow depth of field...


This micrograph of a diatom clearly shows the problem, it is impossible to get the whole sample in focus in one image. Fortunately there are ways around it; by analysing the image for sharp edges it is possible to find which image is the most in-focus and the whole image can then be reconstructed only using the in-focus patches. This process is called focus stacking and generates an extended depth of field. Good free implementations of focus stacking are hard to come across, so I wrote one; you can download the ImageJ macro here.
Using the same technique on macro photography (processing the red, green and blue channels separately) gives a similarly impressive result. The three starting images:


And the extended depth of field result:
Software used:
Image processing: ImageJ

Friday, 18 June 2010

Some more instructables fun... A variable neutral density filter in the cheapest possible way. This can be used to get shallow depth of field (wide aperture) or motion blur even under bright light conditions.


Simple Variable Neutral Density Filter - More DIY How To Projects