Monday, 21 October 2013

The Shape of a Cell

Each term I make a research comic for the Oxford University Biochemical Society magazine called Phenotype. The topic for this cartoon; the function of cell shape in bacteria. You might not know, but bacteria can have one of a huge variety of different shapes, but why cells have a particular shape is not a commonly asked question. To quote Kevin Young: "To be brutally honest, few people care that bacteria have different shapes. Which is a shame, because the bacteria seem to care very much.".

Check out the comic here, the whole issue will be available to download for free from here soon.


Software used:
Autodesk Sketchbook Pro: Drawing the cells.
Inkscape: Page layout.

Tuesday, 15 October 2013

Building a Human

Every single cell in your body is made up of four main types of chemical compound: protein, carbohydrate, lipids/fats and nucleic acids. You are made of molecules, precisely defined and complex molecules, but still just molecules.

The difference in scale between a person and a molecule is enormous. A person is around one to two metres tall. A typical chemical bond is around one to two ångstroms. One ångstrom is tiny; one ten-billionth of a meter. If you took the entire population of the Earth, scaled each person to the size of a typical atomic bond and then stacked everyone head to toe, then the stack would be about your height. This means that, while you are made of molecules, it takes a lot of them to make a person!

The most common type of complex biological molecule in your body are proteins. These are the molecular machines that run your cells. Proteins are made up of chains of different combinations of 21 different amino acids. The amino acids themselves are quite simple molecules; typically made up of 5-10 carbon atoms, a couple of nitrogen and oxygen atoms and a sprinkling of hydrogen. We now know enough about protein amino acid sequences, the structure of cells and the structure of proteins that we could make a pretty good effort of making a scale model of a person, or at least the proteins that make them up.


This picture is a plastic scale model of 100 amino acids, representative of all the amino acids in your body, at about the ratio the different types are used to make up the proteins in your cells. They are ready to clip together to make a scale model of proteins, at a scale of about one centimetre for a bond (100 million times larger than the molecules they represent). Using enough copies of this (and lots of plastic models of water molecules) you could make an accurate scale model of 75% of your body. You would need a lot though; 1,000,000,000,000,000,000,000,000 copies of this set of 100 amino acids. The scale model of your body would also stand around 100,000 kilometres tall (1/3 of the way to the moon), and would weigh much more than the entire Earth.

Your body is an incredible molecular machine, made up of a near-unimaginable mixture of complex biological molecules, all running at a molecular scale. Next time you see someone talking about nanotechnology stop and think for a second. You are nanotechnology; a self-organising, self-repairing, reproducing, thinking piece of nanotech.

Software used:
Blender: 3D design of the plastic scale model.

Friday, 11 October 2013

Making Big Things Look Small

Any photo normally give you an immediate sense of scale, but what is it about the picture that let's you know how big something is? Take a look at these two photos:


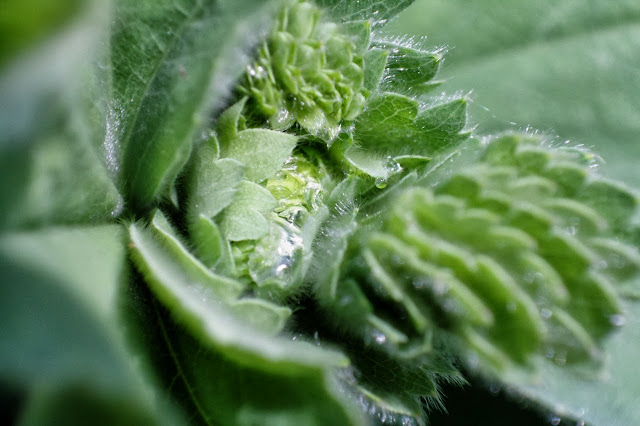
The first photo is clearly of some tiny water droplets on a plant, while the one on the right is clearly of a train running through a city. It isn't just content (train vs. droplet) and context (city vs. leaf) that inform you about the scale; you can trick you eyes into thinking a massive building is actually a miniature. There are other properties of the image that come into play.

The key is blur. In photos of tiny objects the background and foreground of the image are normally very blurred, but with big objects the background and foreground are normally sharply in focus. I talked about this effect in my last blog post; the bigger the ratio of the size of the lens to the distance to the object, then the more blurred the background and foreground look. Microscopes take this to the extreme, when out of focus parts of the image are so blurred that you can't see what is there at all.

This effect is universal, it even happens with your eyes. You can try it out: hold your finger close to your face (about 15cm/6in away) and look at it with one eye closed. Notice how blurred things in the background look. Now hold out your hand at arms length, and look at it with one eye closed. Now the objects in the background look more sharply in focus.

So to make something big looks small you need to make the foreground and background look blurred. Simple! Before digital image processing (Photoshop) effects like this had to be done in camera. It was surprisingly easy; take a camera with a detachable lens, and detach the lens from the camera. If you now set up the lens pointing at something you want to take a photo of, but tilt the camera relative to the lens, then you get an effect which is a bit like blurring the foreground and background of the image. This happens because one side of the image sensor/film is now a bit too close to the lens. This makes that side of the camera long sighted, and that side of the image blurry. The other side of the image sensor/film is also at the wrong distance from the lens, but is a bit too far instead of a bit too close. This makes the other side of the camera a bit short sighted, and makes that side of the image blurry too. The middle of the image sensor/film is still at the correct distance from the lens though, so the middle of the image is still in focus.

In principle this is simple, but in practice detaching the lens from your camera just means lots of stray light can sneak into the photo making glare. In practice you need to use a special lens which can be tilted while still attached to the camera, called a tilt shift lens. These are very specialised and cost a huge amount; it is much cheaper to fake the effect using a computer! There are many pieces of software that let you imitate tilt shift lenses, all that is needed is a gradually increasing blur as you move away from the line across the image that you want to remain in focus. I actually wrote a filter in ImageJ which does this processing. It is amazing how much this simple effect can trick your eye; it makes big things looks small by imitating the limitations of focal depth when using lenses to make an image.

This is the same photo as above, but with a tilt shift effect applied to it. This chunk of London now looks like a miniature, with a tiny toy train running through it.

The Tower of London, looking a lot smaller than usual!

The reverse effect happens too, though is psychologically less strong. This is part of the reason scanning electron microscope images are so compelling; they don't use light or lenses (at least in a conventional sense) to generate the image. This lets everything, from background to foreground, be sharply focused. It makes the microscopic world feel free big and accessible.

This diatom shell is less than a 0.1mm wide, but the sharpness of the foreground and background make it feel larger.

Artificially blurring the foreground and background makes it seem much smaller.

When communicating science it is important to think about the scale things appear; scanning electron microscope images break your intuitive concept of scale, and it is hard to imagine just how small the sample is. The image below, by Donald Bliss and Sriram Subramaniam and awarded Honorable Mention in the National Geographic best science images of 2008, is of the structures inside a single cell, and is a perfect example of why you need to think about scale. This image is a computational reconstruction, so it could be presented with pin sharp focus, but by blurring the background it conveys the sense of scale extremely well. It feels like a single cell.


Software used:
Photomatix Pro: Generating the tonemapped HDR photos.
UFRaw: Camera raw file conversion.
ImageJ: Custom tilt shift filtering.

Tuesday, 16 July 2013

Micro 3D Scanning - 1 Focal Depth

3D scanning is a very powerful tool, and it's value isn't limited to the objects and scenes you interact with in everyday life. The ability to precisely determine the 3D shape of tiny (even microscopic) objects can also be really useful.

 The 3D reconstructed shape of a tiny (0.8 by 0.3 mm) surface mount resistor on a printed circuit board. This was made using only a microscope; no fancy laser scanning required!

3D scanning through a microscope is a bit different to normal 3D scanning; mostly because when you look down a microscope at an object it looks very different to what you might expect from day-to-day life. The most immediately obvious effect is that out of focus areas are very out of focus, often to the point where you can barely see what is there. This effect comes down to the angle over which light is collected by the lens capturing the image; your eye or a camera lens in everyday life, or an objective lens when using a microscope.

Three images of the surface mount resistor. The three pictures are taken at different focus distances so different parts of the image are clear and others blurred. The blurred parts are very blurred!

In every-day-life when using a camera or your eyes distance from the lens to the object is normally long, it may be several metres or more. As a result the camera/your eye only collects light over a small of angle, often less than one degree. In comparison microscopes collect light from an extremely large range of angles, often up to 45 degrees. The angle must be this large because the objective lens sits so close to the sample. A wider angle of light collection makes out of focus objects appear more blurred. In photography terms the angle of light collection is related to the f-number, and large f-numbers (which have a large angle of light collection) famously have very blurred out of focus portions of the image.

The upshot of this is that in a microscope image the in focus parts of an image are those which lie very near (often within a few micrometers) to the focal plane. It is quite easy to automatically detect in focus parts of an image by using local image contrast (this is actually how autofocus works in many cameras) to map which parts of a microscope image are perfectly in focus.

In this series of images the most in-focus one is image 6 because it has the highest local contrast...

 ... using edge detection to emphasise local contrast in the image really highlights which one is perfectly in focus.

In this series of images the most in-focus one is image 55 instead.

The trick for focus 3D scanning down a microscope is taking the ability to detect which parts of an image are in focus, and using this to reconstruct the 3D shape of the sample. Going to the 3D scan is actually really easy:
  1. Capture a series of images with the focus set to different distances.
  2. Map which parts of each of these images are perfectly in focus.
  3. Translate this back to the focus distance used to capture the image.
This concept is very simple; if you know one part of an object is perfectly in focus when the focus distance is set to 1mm, that means it is positioned exactly 1mm from the lens. If a different part is perfectly in focus when the focus distance is 2mm, then it must be positioned 2mm from the lens. Simple!

It may be a simple idea, but this method gives a high quality 3D reconstruction of the object.

The reconstructed 3D shape of the resistor, using 60 images focused 0.01mm apart, mapped to a depth map image. The lighter bits stick out more from the surface, and the darker bits stick out less.


Using the depth map to reconstruct the resistor reconstructed in full colour in 3D! Pretty cool for something less than 1 mm long...

Does that seem impressive? Then check out the videos:


A video of the original focus series of images captured of the resistor.


The reconstructed 3D shape.


A 3D view of the resistor, fully textured.


This approach is, roughly speaking, how most 3D light microscopy is done in biological and medical research. It is very common practice to capture a focal series like this (often called a "z stack") to get this 3D information from the sample. 3D imaging is most useful in very thick samples where you want to be able to analyse the structure in all three dimensions, an example might be analysing the structure of a tumour. My research on Leishmania parasites inside white blood cells uses this approach a lot too. The scanning confocal fluorescence microscope was actually designed to maximise the value of this 3D effect by not only blurring out of focus parts of the image, but also eliminating the light all together by blocking it from reaching the camera.

Software used:
ImageJ: Image analysis.
Blender: 3D viewing and rendering.

Marista - my second professional font!

It has been over a year since I released my last font. This new one, Marista, has actually been sat on my hard disk for over 9 months so it is about time it saw the light of day! You can take a look at the interactive previews here: http://www.myfonts.com/fonts/zephyris/marista/


Marista is a bit of an unusual design. It is a monospaced font meaning every symbol is equal in width (like found on a typewriter; Courier is the classic example) but unlike most monospaced fonts it is designed to be a stylistic cursive script, within the constraints of the even letter width. It is actually based on a real and popular typewriter font used in the 1960s-70s, and I designed it to try and capture some of the light irregularities which characterise real typewritten fonts rather than their computer equivalents. The name itself is a derived from Maritsa, the name of the major Bulgarian typewriter company; it was a Maritsa typewriter sample which first introduced me to this text style.


It is a very distinctive, yet readable, font and I designed it with the intention to be used in a block of text. Both normal and italic variants are available, though the original typewriter fonts are more similar to the italic. At very large scales the subtle irregularities which make it look authentically typewritten can look awkward, but in a block of text this slight irregularity really captures the typewritten feeling. Try writing your next letter or invitation in it!

Software used:
Inkscape: Outline design
FontForge: Glyph coding and font generation

Wednesday, 3 July 2013

Cell Biology of Infectious Pathogens - Ghana 2013

For the last four years there has been a cell biology workshop in West Africa, organised by Dick McIntosh, an intense two week course aiming to help young African scientists around the master's degree stage of their careers. This course ran again this year, and was the first organised by Kirk Deitsch (malaria expert and a regular from the previous courses) and I was fortunate enough to be invited to teach the trypanosome half of the course. For its fifth incarnation the course returned to a location where it has previously been held, the Department of Biochemistry, Cell and Molecular Biology in the University of Ghana, and was organised with Gordon Awandare.


The focus this year was teaching basic cell biology and the associated lab techniques, emphasising how this helps understand and fight some of the major parasitic diseases in Africa: African trypanosomiasis (sleeping sickness), leishmaniasis and malaria. All three of these diseases impact Ghana and the surrounding countries and these diseases are of enormous interest to students embarking on a scientific career in Africa.


Of the three diseases we were teaching about malaria is by far the most well known, both locally and internationally. It is caused by Plasmodium parasites (which are single cell organisms) which force themselves inside the red cells in the blood to hide from the host immune system. Malaria is often viewed as the iconic neglected tropical disease, however in the last 10 years or so the understanding of the disease and efforts to find a vaccine and new drugs has improved vastly. Unfortunately it is still very common (we had one case in the participants on the course in the two weeks), drug resistance is rising, and it places a huge cost and health burden on the affected countries. It also impacts a huge area; almost all of sub-Saharan Africa is at risk.

Looking at Leishmania. One of the lab practicals was making light microscopy samples from non-human infective Leishmania using Giemsa stain.

Leishmaniasis and trypanosomiasis are caused by two related groups of parasites, Leishmania and trypanosomes (also single cell organisms), and if malaria is a neglected tropical disease the these are severely neglected tropical diseases. The two parasites live in different areas in the host, trypanosomes swim in the blood while Leishmania live inside macrophages, a type of white blood cell that should normally eat and kill parasites. In comparison to malaria fewer drugs are available, the drugs are less effective and several have severe side effects. Even diagnosis is thought to often be inaccurate. The impact of these diseases is less than malaria; human trypanosomiasis is thought to be relatively rate and leishmaniasis is confined to a semi-desert band just to the south of the Sahara. Trypanosomiasis does have a huge economic impact though, as it infects cattle and prevents milk and meat production, and cases of leishmaniasis are probably under-reported.

Staining trypanosomes. One practical was making immunofluorescence samples. In this sample the flagellum of trypanosomes was stained fluorescent green using the antibody L8C4.

So what did we teach?

The teaching was a mixture of lectures, small group discussions, lab practicals and lab demonstrations and we taught for 14 hours a day for 11 days; we could cover a lot of material! All the teaching was focused on linking basic cell biology to parasites and to practical lab techniques. Topics taught included how parasites avoid the host immune system, molecular tools to determine parasite species, light microscopy techniques, using yeast as tool to analyse cell biology of proteins from other species, host cell interaction of parasites, and many more.

Detecting human-infective trypanosomes. This gel of PCR products shows whether the template DNA was from a human-infective or non-human infective subspecies of T. brucei. If there was a DNA product of the correct size (glowing green) then the sample was human-infective.

A great example of how all the teaching tied together was polymerase chain reaction (PCR) to determine species. Human-infective trypanosomes have a single extra gene which lets them resist an innate immune factor in human blood which would otherwise kill them, and I taught about why this is important for understanding the disease and how it was discovered. This gene can be detected by PCR, and this technique is used to tell if a particular trypanosome sample could infect people. We ran a practical actually doing this in the lab.

PCR is a simple, adaptable and easy technique for checking any parasite for a particular species-defining or drug resistance gene, and we also taught how to use online genome sequence data to design PCR assays. We even worked through PCR assay design for many individual participant's personal research projects, really transferring the skills we were teaching to their current research. Finally we looked at papers using PCR techniques to critically analyse the experiment and assay design to help people avoid pitfalls in their own work.

This was a great demonstration of how basic cell biology and lab techniques can have real practical application with medical samples and help with surveillance of a disease. We designed all of the teaching to have this kind of practical application.


7x speed timelapse video of fish melanophores responding to adrenaline.

One practical with massive visual impact was the response of fish melanophores to adrenaline/epinephrine. Fish normally use these cells to change colour in response to stimuli and melanin particles (melanosomes) inside specialised cells (melanophores) run along the microtubules which make up a large portion of the cell cytoskeleton. We used it to demonstrate signalling; adrenaline can be used to stimulate movement of the melanosomes towards the centrosome.

This is really flexible experimental system for demonstrating the functions of the cytoskeleton, motor proteins and signalling pathways because the output (movement of the pigment particles) is so easy to observe with a cheap microscope or even a magnifying glass. This experiment was particularly chosen as it is a useful and accessible teaching tool for cell and molecular biology, and many of the course participants had teaching obligation in addition to their research.


Western blots in Western Africa. 100x timelapse of loading and running a SDS-PAGE gel.

We aimed to cover all the major molecular and cell biology techniques and had practicals doing microscopy, immunofluorescence, growing a microorganism (in this case yeast), PCR, agarose gel electrophoresis SDS-PAGE and Western blotting. The yeast practicals were particularly cool; using genetically modified cell lines the students analysed the function of p53, a transcription factor with a major role in recognising genetic damage and avoiding cancer, and how well it promotes transcription from different promoter sequences. These practicals taught growing yeast, temperature sensitive mutants, several types of reporter proteins in yeast and Western blotting, all concerning a transcription factor with huge clinical relevance in cancer!

Exploring DNA and protein structures through PyMol in a bioinformatics session.

Practicals weren't just limited to lab practicals though. We also ran interactive bioinformatics sessions looking at the kinds of data which are freely available in genome and protein structure databases online. These were also very popular, especially as so much data is available for free online.

All in all the course was a great success. The participants were all extremely enthusiastic, hard working and scarily smart! Feedback so far has also been very positive. I feel that courses like this can have a huge impact on the careers of young African scientists, and I sincerely hope that funding can be secured to continue running this type of course in the future.

You can also read more about this course at the ASCB website.

Software used:
ImageJ: Image processing and timelapse video creation.
Tasker for Android: Timelapse video capture.
Pymol: Protein structure analysis