Showing posts with label macro. Show all posts

Monday, 24 March 2014

Finding Circles

Today's random image processing tip: finding circles in images. Circular structures pop up all over the place, from craters on Mars to cross-sections through microtubules inside cells, and automatically detecting them in an image is often really useful! Take this starting image:

An electron microscope image, with the circular crossection of a microtubule.

Using the right filter, circular structures like the microtubule pop out as bright spots. Bright spots are then easy to pull out for later automatic image analysis steps.

 The electron microscope image after filtering.

The trick is use to use a kernel filter designed to find circles. Kernel filters are most commonly used for quickly filtering or sharpening a picture: this simple kernel finds edges in an image:

0  1  0
1 -4  1
0  1  0

Applying a kernel to an image is done by looking at each pixel in turn, and setting its new value according to the values in the kernel. In this example the new pixel value is equal to -4× the current pixel, plus 1× the pixel above, left, below and right of the current pixel.

To find circles the kernel should look like a circle. To find the microtubule in the electron microscope image this kernel, a circle the same size as the microtubule, was used:


This image can be represented as a matrix of numbers, which can be applied as a kernel:

0 0 0 0 0 0 0 0 0 0 0 0 0 0 0 0 1 1 1 1 1 1 1 1 1 0 0 0 0 0 0 0 0 0 0 0 0 0 0 0 0 
0 0 0 0 0 0 0 0 0 0 0 0 0 1 1 1 0 0 0 0 0 0 0 0 0 1 1 1 0 0 0 0 0 0 0 0 0 0 0 0 0 
0 0 0 0 0 0 0 0 0 0 0 1 1 0 0 0 0 0 0 0 0 0 0 0 0 0 0 0 1 1 0 0 0 0 0 0 0 0 0 0 0 
0 0 0 0 0 0 0 0 0 1 1 0 0 0 0 0 0 0 0 0 0 0 0 0 0 0 0 0 0 0 1 1 0 0 0 0 0 0 0 0 0 
0 0 0 0 0 0 0 0 1 0 0 0 0 0 0 0 0 0 0 0 0 0 0 0 0 0 0 0 0 0 0 0 1 0 0 0 0 0 0 0 0 
0 0 0 0 0 0 0 1 0 0 0 0 0 0 0 0 0 0 0 0 0 0 0 0 0 0 0 0 0 0 0 0 0 1 0 0 0 0 0 0 0 
0 0 0 0 0 0 1 0 0 0 0 0 0 0 0 0 0 0 0 0 0 0 0 0 0 0 0 0 0 0 0 0 0 0 1 0 0 0 0 0 0 
0 0 0 0 0 1 0 0 0 0 0 0 0 0 0 0 0 0 0 0 0 0 0 0 0 0 0 0 0 0 0 0 0 0 0 1 0 0 0 0 0 
0 0 0 0 1 0 0 0 0 0 0 0 0 0 0 0 0 0 0 0 0 0 0 0 0 0 0 0 0 0 0 0 0 0 0 0 1 0 0 0 0 
0 0 0 1 0 0 0 0 0 0 0 0 0 0 0 0 0 0 0 0 0 0 0 0 0 0 0 0 0 0 0 0 0 0 0 0 0 1 0 0 0 
0 0 0 1 0 0 0 0 0 0 0 0 0 0 0 0 0 0 0 0 0 0 0 0 0 0 0 0 0 0 0 0 0 0 0 0 0 1 0 0 0 
0 0 1 0 0 0 0 0 0 0 0 0 0 0 0 0 0 0 0 0 0 0 0 0 0 0 0 0 0 0 0 0 0 0 0 0 0 0 1 0 0 
0 0 1 0 0 0 0 0 0 0 0 0 0 0 0 0 0 0 0 0 0 0 0 0 0 0 0 0 0 0 0 0 0 0 0 0 0 0 1 0 0 
0 1 0 0 0 0 0 0 0 0 0 0 0 0 0 0 0 0 0 0 0 0 0 0 0 0 0 0 0 0 0 0 0 0 0 0 0 0 0 1 0 
0 1 0 0 0 0 0 0 0 0 0 0 0 0 0 0 0 0 0 0 0 0 0 0 0 0 0 0 0 0 0 0 0 0 0 0 0 0 0 1 0 
0 1 0 0 0 0 0 0 0 0 0 0 0 0 0 0 0 0 0 0 0 0 0 0 0 0 0 0 0 0 0 0 0 0 0 0 0 0 0 1 0 
1 0 0 0 0 0 0 0 0 0 0 0 0 0 0 0 0 0 0 0 0 0 0 0 0 0 0 0 0 0 0 0 0 0 0 0 0 0 0 0 1 
1 0 0 0 0 0 0 0 0 0 0 0 0 0 0 0 0 0 0 0 0 0 0 0 0 0 0 0 0 0 0 0 0 0 0 0 0 0 0 0 1 
1 0 0 0 0 0 0 0 0 0 0 0 0 0 0 0 0 0 0 0 0 0 0 0 0 0 0 0 0 0 0 0 0 0 0 0 0 0 0 0 1 
1 0 0 0 0 0 0 0 0 0 0 0 0 0 0 0 0 0 0 0 0 0 0 0 0 0 0 0 0 0 0 0 0 0 0 0 0 0 0 0 1 
1 0 0 0 0 0 0 0 0 0 0 0 0 0 0 0 0 0 0 0 0 0 0 0 0 0 0 0 0 0 0 0 0 0 0 0 0 0 0 0 1 
1 0 0 0 0 0 0 0 0 0 0 0 0 0 0 0 0 0 0 0 0 0 0 0 0 0 0 0 0 0 0 0 0 0 0 0 0 0 0 0 1 
1 0 0 0 0 0 0 0 0 0 0 0 0 0 0 0 0 0 0 0 0 0 0 0 0 0 0 0 0 0 0 0 0 0 0 0 0 0 0 0 1 
1 0 0 0 0 0 0 0 0 0 0 0 0 0 0 0 0 0 0 0 0 0 0 0 0 0 0 0 0 0 0 0 0 0 0 0 0 0 0 0 1 
1 0 0 0 0 0 0 0 0 0 0 0 0 0 0 0 0 0 0 0 0 0 0 0 0 0 0 0 0 0 0 0 0 0 0 0 0 0 0 0 1 
0 1 0 0 0 0 0 0 0 0 0 0 0 0 0 0 0 0 0 0 0 0 0 0 0 0 0 0 0 0 0 0 0 0 0 0 0 0 0 1 0 
0 1 0 0 0 0 0 0 0 0 0 0 0 0 0 0 0 0 0 0 0 0 0 0 0 0 0 0 0 0 0 0 0 0 0 0 0 0 0 1 0 
0 1 0 0 0 0 0 0 0 0 0 0 0 0 0 0 0 0 0 0 0 0 0 0 0 0 0 0 0 0 0 0 0 0 0 0 0 0 0 1 0 
0 0 1 0 0 0 0 0 0 0 0 0 0 0 0 0 0 0 0 0 0 0 0 0 0 0 0 0 0 0 0 0 0 0 0 0 0 0 1 0 0 
0 0 1 0 0 0 0 0 0 0 0 0 0 0 0 0 0 0 0 0 0 0 0 0 0 0 0 0 0 0 0 0 0 0 0 0 0 0 1 0 0 
0 0 0 1 0 0 0 0 0 0 0 0 0 0 0 0 0 0 0 0 0 0 0 0 0 0 0 0 0 0 0 0 0 0 0 0 0 1 0 0 0 
0 0 0 1 0 0 0 0 0 0 0 0 0 0 0 0 0 0 0 0 0 0 0 0 0 0 0 0 0 0 0 0 0 0 0 0 0 1 0 0 0 
0 0 0 0 1 0 0 0 0 0 0 0 0 0 0 0 0 0 0 0 0 0 0 0 0 0 0 0 0 0 0 0 0 0 0 0 1 0 0 0 0 
0 0 0 0 0 1 0 0 0 0 0 0 0 0 0 0 0 0 0 0 0 0 0 0 0 0 0 0 0 0 0 0 0 0 0 1 0 0 0 0 0 
0 0 0 0 0 0 1 0 0 0 0 0 0 0 0 0 0 0 0 0 0 0 0 0 0 0 0 0 0 0 0 0 0 0 1 0 0 0 0 0 0 
0 0 0 0 0 0 0 1 0 0 0 0 0 0 0 0 0 0 0 0 0 0 0 0 0 0 0 0 0 0 0 0 0 1 0 0 0 0 0 0 0 
0 0 0 0 0 0 0 0 1 0 0 0 0 0 0 0 0 0 0 0 0 0 0 0 0 0 0 0 0 0 0 0 1 0 0 0 0 0 0 0 0 
0 0 0 0 0 0 0 0 0 1 1 0 0 0 0 0 0 0 0 0 0 0 0 0 0 0 0 0 0 0 1 1 0 0 0 0 0 0 0 0 0 
0 0 0 0 0 0 0 0 0 0 0 1 1 0 0 0 0 0 0 0 0 0 0 0 0 0 0 0 1 1 0 0 0 0 0 0 0 0 0 0 0 
0 0 0 0 0 0 0 0 0 0 0 0 0 1 1 1 0 0 0 0 0 0 0 0 0 1 1 1 0 0 0 0 0 0 0 0 0 0 0 0 0 
0 0 0 0 0 0 0 0 0 0 0 0 0 0 0 0 1 1 1 1 1 1 1 1 1 0 0 0 0 0 0 0 0 0 0 0 0 0 0 0 0 

And that's it! This kernel picks out circular features the same size of the kernel, and makes them pop out as bright spots. Need to do something like this yourself? This ImageJ macro will get you started.

Software used:
ImageJ
Monday, 6 January 2014

Mould

Have you ever looked closely at mould?


Look closer...


Classic pin mould, like you often find on decomposing fruit, is an amazing micro machine. The head of each pin contains the developing spores which are released to spread the mold. This release process ranges from the gentle to the extreme, from a gentle puff of spores to one of the fastest events in the natural world. The hat thrower fungus pin head fires off the end of the pins with an acceleration of 0 to 45 mph in less than 1 mm; an acceleration of over 20,000 g.

Software used:
UFRaw: Raw to tiff conversion of raw camera files.
ImageJ: Focus stacking.
Hugin: Panorama stiching.

Thursday, 27 October 2011

Macro Microchip

To see this (much) bigger click here. This is a single integrated circuit die only 3 by 2 mm in size... The thin silver wires radiating from the edges of the die connect the integrated circuit to the legs of its case. The two large greyish patches are the chip's memory, this is an EPROM chip which stores data or programs. The data can be erased by shining a bright UV light onto the microchip. The other fine detail is the control circuitry which lets the chip actually access its memory, write to the memory and function as a microcontroller.

This picture was taken with a Canon 450D using a reversed 18-55mm lens set to 18mm.

Software used:
UFRaw - For RAW to jpeg conversion with colour balancing, etc.


Tuesday, 13 July 2010

Extended Depth of Field

One of the tricky things with microscopy and macro photography is the depth of field, as you start magnifying a sample you need to collect as much light as possible to generate the image with a sensible exposure time. Unfortunately this requires a large aperture, and this creates a very shallow depth of field...


This micrograph of a diatom clearly shows the problem, it is impossible to get the whole sample in focus in one image. Fortunately there are ways around it; by analysing the image for sharp edges it is possible to find which image is the most in-focus and the whole image can then be reconstructed only using the in-focus patches. This process is called focus stacking and generates an extended depth of field. Good free implementations of focus stacking are hard to come across, so I wrote one; you can download the ImageJ macro here.
Using the same technique on macro photography (processing the red, green and blue channels separately) gives a similarly impressive result. The three starting images:


And the extended depth of field result:
Software used:
Image processing: ImageJ

Thursday, 20 August 2009

3D Texturing

Texturing in 3D is a pesky thing, images are 2D and 3D meshes are obviously 3D! Furthermore 2D images are always rectangular. There are two main ways of texturing a 3D object, neither of them great when you just want a quick seamless texturing job...

1. Simple mapping
For example cube mapping. For these the texture is projected onto the mesh according to very simple rules, for cube mapping this is simply if a face is pointing in the direction of one side of a cube then it gets its texture from that cube face. Mapping in this way has problems of distortion, for example if you try and use cube mapping on a sphere then you get problems of distortion near the cube corners. The texture also has to tile at each edge (ie. top to bottom, top to top, top to side, side to side, etc.) to prevent seams. Other mapping methods which avoid seams (eg. sphere or cylinder) tend to cause more distortion. This mapping is, however, dead easy to do and good procedural texures can reduce tiling problems.

Sphere mapping:

Cube mapping:

2. UV mapping
Here the 3D object is unwrapped to a 2D shape, think about flattening a cardboard box to its net. This can eliminate distortion (just make sure the unwrapping is good and doesn't change the shape of any faces). The big problem is tiling; a face on the 2D image may be isolated from its neighbours in 3D, it is hard to make a texture which links these edges with no errors... Making a logical UV unwrap for a texture artist to work with is very time consuming.

This is where I stepped in! I have been working on a way to let you do 3D texturing on any UV unwrapped model.

3D Texturing
All real life objects are "3D textured", ie. the texture could be calculated for any point in 3D space. Imagine cutting a plank of wood in half to reveal a new face; you reveal a new part of the 3D texture, some new grain, which (obviously) perfectly tiles with the sides around it. It is simple to use procedural textures to make a full 3D texture on a computer, you just need a way to transfer the correct information to the correct object faces of a 3D model.

The Method:
In blender:
1. Take the object you want to texture
2. UV unwrap it (while this method takes care of all distortion it is still best to make sure there are no really tiny faces)
3. Give the object the 3Dtexturingtool texture (this encodes the x,y,z location of every point on every face to a specific RGB colour)
4. Bake the object texture to the UV unwrapped image
OR
3/4. Bake the displacement data

In ImageJ
5. Open the image encoding the x,y,z locations
6. Run a macro which calculates the value of a 3D texture at each x,y,z location and writes that to the imageIn blender
7. Assign the new texture image to the object

This allows 100% tiling 100% distortion free texturing of an object, so far I have only written an ImageJ macro for assigning 3D perlin noise, but it works beautifully!The Limitations
This is limited to a 256x256x256 voxel texture (each r, g and b, so x, y and z, can only take a value of 0-255), so large images or detailed textures will become voxelated. There are ways around this (eg. encoding the x, y and z directions separately using all r,g,b colours for each direction in more detail), but these are significantly more hassle because you would have to bake the texture 3 times per object. I might do this if I ever need more detail!
It is also (currently) cringingly slow... This is because I don't know how to program efficiently and because it uses a macro, not even a proper script. It would probably be over 1000 times faster if you actually programmed it properly!
It is also (currently) useless because you can do this all with blender anyway, however it gives easy access to the tools needed to generate more interesting procedural textures outside of blender; I have planets and asteroids in mind!

Software Used:

ImageJ - Image generation

Blender - 3D modelling, texturing and rendering

Thursday, 16 July 2009

A Little Less Random

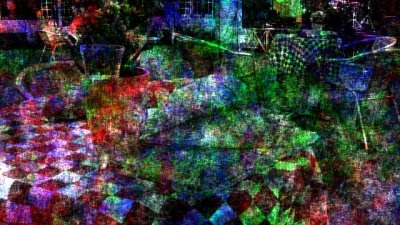
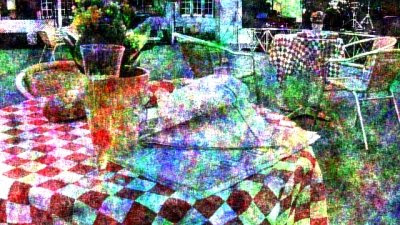
And because I was bored... Using a random walk with weighted probabilities it can be used to generate an image in an "artistic" way; separate random walks were used for red, green and blue channels, along with white to enhance contrast and reduce colour change side effects. Watch the video here.


Using random walks in this way has some interesting side effects; a "momentum" effect has to be included to prevent the walks getting stuck in local minima. Without the momentum effect the random walk effectively acts as a low frequency Fourier filter... To get the above effect a momentum effect of 0.4 (a 0.4 chance of just continuing in the same direction) was used.

Software used:
Image creation: ImageJ
Video transcoding: VLC media player

A Little Random

So I'm feeling a little random today, so a little random walk of fun!
This was made using ImageJ's powerful macro abilities; see the image's Wikipedia page for the macro used.

Software used:
Everything: ImageJ