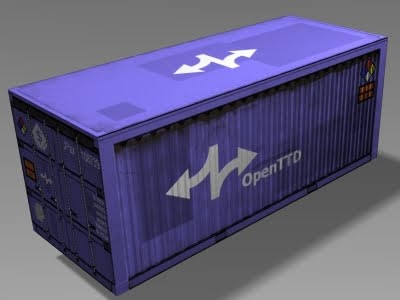
Thursday 20 August 2009

3D Texturing

Texturing in 3D is a pesky thing, images are 2D and 3D meshes are obviously 3D! Furthermore 2D images are always rectangular. There are two main ways of texturing a 3D object, neither of them great when you just want a quick seamless texturing job...

1. Simple mapping
For example cube mapping. For these the texture is projected onto the mesh according to very simple rules, for cube mapping this is simply if a face is pointing in the direction of one side of a cube then it gets its texture from that cube face. Mapping in this way has problems of distortion, for example if you try and use cube mapping on a sphere then you get problems of distortion near the cube corners. The texture also has to tile at each edge (ie. top to bottom, top to top, top to side, side to side, etc.) to prevent seams. Other mapping methods which avoid seams (eg. sphere or cylinder) tend to cause more distortion. This mapping is, however, dead easy to do and good procedural texures can reduce tiling problems.

Sphere mapping:

Cube mapping:

2. UV mapping
Here the 3D object is unwrapped to a 2D shape, think about flattening a cardboard box to its net. This can eliminate distortion (just make sure the unwrapping is good and doesn't change the shape of any faces). The big problem is tiling; a face on the 2D image may be isolated from its neighbours in 3D, it is hard to make a texture which links these edges with no errors... Making a logical UV unwrap for a texture artist to work with is very time consuming.

This is where I stepped in! I have been working on a way to let you do 3D texturing on any UV unwrapped model.

3D Texturing
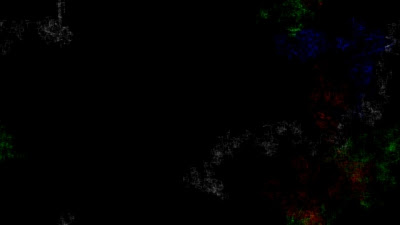
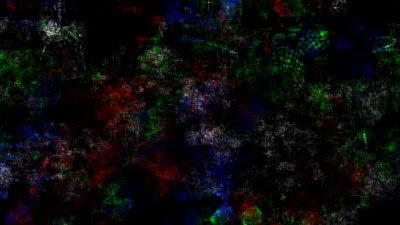
All real life objects are "3D textured", ie. the texture could be calculated for any point in 3D space. Imagine cutting a plank of wood in half to reveal a new face; you reveal a new part of the 3D texture, some new grain, which (obviously) perfectly tiles with the sides around it. It is simple to use procedural textures to make a full 3D texture on a computer, you just need a way to transfer the correct information to the correct object faces of a 3D model.

The Method:
In blender:
1. Take the object you want to texture
2. UV unwrap it (while this method takes care of all distortion it is still best to make sure there are no really tiny faces)
3. Give the object the 3Dtexturingtool texture (this encodes the x,y,z location of every point on every face to a specific RGB colour)
4. Bake the object texture to the UV unwrapped image
OR
3/4. Bake the displacement data

In ImageJ
5. Open the image encoding the x,y,z locations
6. Run a macro which calculates the value of a 3D texture at each x,y,z location and writes that to the imageIn blender
7. Assign the new texture image to the object

This allows 100% tiling 100% distortion free texturing of an object, so far I have only written an ImageJ macro for assigning 3D perlin noise, but it works beautifully!The Limitations
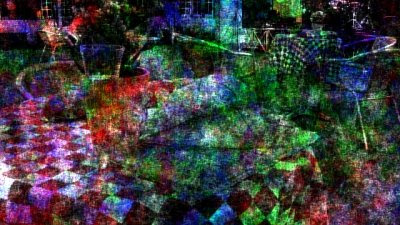
This is limited to a 256x256x256 voxel texture (each r, g and b, so x, y and z, can only take a value of 0-255), so large images or detailed textures will become voxelated. There are ways around this (eg. encoding the x, y and z directions separately using all r,g,b colours for each direction in more detail), but these are significantly more hassle because you would have to bake the texture 3 times per object. I might do this if I ever need more detail!
It is also (currently) cringingly slow... This is because I don't know how to program efficiently and because it uses a macro, not even a proper script. It would probably be over 1000 times faster if you actually programmed it properly!
It is also (currently) useless because you can do this all with blender anyway, however it gives easy access to the tools needed to generate more interesting procedural textures outside of blender; I have planets and asteroids in mind!

Software Used:

ImageJ - Image generation

Blender - 3D modelling, texturing and rendering

Wednesday 19 August 2009

Normaler Maps

And because I am so proud; here is an animation showing the addition of different layers of detail to the shipping container to generate its final appearance.

Sunday 16 August 2009

Normal Maps

Normal mapping, and in fact all progress in 3D computer graphics, never ceases to amaze me... Using just 12 triangles you can achieve some truly amazing things; this is a shipping container initially modelled using about 10,000 triangles then simplified using normal mapping to a simple cuboid. Hopefully the guys over at the OpenTTD high resolution sprite project can find some use for it!

After modelling the container was textured with a variety of "layers" to give flexibility, in this case there is a base colour (which affects the whole model except the bare metal door locks/handles), a paint mess texture (to add some variation to the otherwise "flat" colour), an ambient light texture (to give quick approximate shading on the fine details), a dirt and rust texture (separate from the base colour so its influence can be adjusted separately) and a detail texture with logos, stickers, etc.

Even more detail was added using normal mapping from the rust and detail textures; this gives the slightly lumpy look to the rust and exaggerates the edges of the detail making the logos look as if they were actually stuck/painted on.

Watch a video (HD available) of it rotating here.

These are low quality versions of the textures used for diffuse and normal mapping, the originals are all 1024x1024px except the detail texture which is 2048x2048px to preserve the sharp edges of the shapes.

The bump map from which the normal map was calculated:
The ambient lighting/shadowing map:
The mask used to show where needs to take the base colour of the container:
The messy paint detail, complete with patchy repairs and dribbles, this was mapped to darken the base colour of the crate:
The rust image, this was mapped with the black areas as a dark rust grey and the white areas as transparent:
And finally the detail texture, this texture has an alpha channel so the underlying textures show through:
Software used:
Blender - 3D modelling, texturing and rendering
Paint.net - Texture design
Creature House Expression - Design of the detail texture
The GIMP - More texture design!
VLC - Video transcoding

http://www.cgtextures.com/ - Paint smudge and rust stock texture images

Thursday 16 July 2009

A Little Less Random

And because I was bored... Using a random walk with weighted probabilities it can be used to generate an image in an "artistic" way; separate random walks were used for red, green and blue channels, along with white to enhance contrast and reduce colour change side effects. Watch the video here.


Using random walks in this way has some interesting side effects; a "momentum" effect has to be included to prevent the walks getting stuck in local minima. Without the momentum effect the random walk effectively acts as a low frequency Fourier filter... To get the above effect a momentum effect of 0.4 (a 0.4 chance of just continuing in the same direction) was used.

Software used:
Image creation: ImageJ
Video transcoding: VLC media player

A Little Random

So I'm feeling a little random today, so a little random walk of fun!
This was made using ImageJ's powerful macro abilities; see the image's Wikipedia page for the macro used.

Software used:
Everything: ImageJ

Sunday 12 July 2009

Laser Diffraction

My most important point: lasers are awesome! There is a surprising amount of DIY geeky physics that you can do with a laser pointer and some bodged together diffraction slits and holes.Using two razor blades held a few tenths of a millimetre apart and a red and green laser pointer you can get some pretty good diffraction patterns.
It even behaves as expected! The increase in wavelength gives a corresponding increase in fringe spacing.

Laser diffraction patterns are a perfect test ground for fourier transform analysis, the fourier transform of the diffraction pattern gives the shape of the diffraction slit used.
This is the aperture I hacked together from a piece of 1mm aluminium and a drawing pin. The ruler markings are 1mm apart.
The diffraction pattern encodes the information about the aperture shape in the positioning of the fringes. The roughly circular diffraction pattern shows that the aperture is approximately circular.

Calculating a 2D fourier transform of the diffraction pattern gives the above image, an accurate reconstruction of the shape of an aperture only a few tenths of a millimetre across.

Software used:
Fourier transforms: ImageJ
Image management: Paint.net

Wednesday 8 July 2009

Paper Autofluorescence

Microscopes are fun... Small things are cool! This is paper in all its fibrous glory; illuminated in ultraviolet paper autofluoresces at blue wavelengths and looks amazing! This was created from a 3x3 array of images, see the links below for higher resolutions:
6400x4800 at Wikipedia
Single screen wallpapers at Deviantart
Dual screen wallpapers at Deviantart

Software used:
The GIMP

Monday 6 July 2009

Transparent Coke

Several people have had a hard time believing that coke is transparent in infrared, here's the proof that I am right! (You know what it's like; it was a hot day, I had a cold glass of coke with ice and happen to have an infrared webcam...)

I should have made a video of this, you get really nice refractive distortions (like heat haze) around the ice cubes as they melt...

Software used:
Webcam still image capture: Amcap (I can't find the official website!)

Tuesday 30 June 2009

Infrared Sky Timelapse

And now for the timelapse, this is one I captured yesterday at one frame per five seconds, over 10000 images! This really shows how nicely infrared light cuts through the haze on a humid day and increases the contrast between the sky and clouds. Check it out here.

Software used:
Webcam capture: AbelCam
Automated image sequence renaming: ImageJ
Video creation: VirtualDub
Video transcoding: VLC media player

Sunday 28 June 2009

IR Webcams and Night Vision

One thing most people don't realise about CCDs (the light sensors in the vast majority of digital cameras) is that they are very sensitive to infrared light. Sadly this is only near infrared, 800-1000nm wavelength, not thermal infrared, but is still great fun!

Modification of a webcam to see at these wavelengths is generally very simple, you simply have to take out the filter which cuts out the infra red light...
Then replace it with a filter which only lets infrared light through, household examples of this are exposed colour film negatives, a floppy disk platter, magnetic tape from a cassette and coke...
You can see the IR filter in the centre, it's the greenish glass, and my replacement filter cut from a floppy disk to the right.

Once converted the webcam will act like a black and white camera (the filters used to give individual pixels different colour sensitivities are transparent to infrared). The sky appears dark, plants a brilliant white. Fluorescent lights produce no infrared light, but the glow from your oven lights up the whole kitchen! Infrared is particularly suited to cloud and landscape photos as it is less affected by haze.
At some point I'll get round to posting a timelapse of the sky in infrared, it looks amazing!

Monday 22 June 2009

Timelapse and Snow

Amongst some of the more unusual things I have collected over the last year is a set of 3 identical (at least till I got my hands on them!) webcams. They all now have some pretty interesting properties - infrared, pinhole, low light, spectroscope - oh so many things to write about! Having said that I'm just going to show you one of the most basic pieces of fun you can have with a webcam...

Webcams are made for timelapse, it's so easy to set up, and a modern webcam has a pretty good image quality. With no further ado here is a wonderful timelapse of some snow, captured during the heavy snow February this year. Check it out here.

Software used:
Webcam capture: AbelCam
Automated image sequence renaming: ImageJ
Video creation: VirtualDub
Video transcoding: VLC media player

Hello and welcome

Having spent many years at a computer with some very random thoughts and ideas I thought it was about time so share some of these with the world! Here you will be able to follow some of my more obscure and geeky ideas from the strangest depths of my mind and their results.